
How to Sharpen Horse Clipper Blades: Lister & Heiniger Guide
How to sharpen horse clipper blades on a disc or stone: hollow grind, heat limits, tension and set-back for Lister, Heiniger and Liveryman sets. Costs vs replacing. Free sample blades.
Quick answer: To sharpen horse clipper blades, separate the comb and cutter, degrease both, and grind only the flat cutting faces. Use a flat rotating disc (professional) or a 1000-grit then 6000-grit stone (DIY touch-up). Keep each blade moving and never let the steel get too hot to touch, because above about 200°C the teeth lose hardness for good. Re-assemble with the cutter points set back roughly 1mm from the comb points, set the tension just past light contact, and oil every 10-15 minutes of clipping. A professional regrind costs about $10-15 (£8-12) per set, and a set is worth sharpening 3-4 times before tooth wear makes replacement cheaper.
We manufacture comb and cutter sets for large-animal clippers, and a good share of our warranty returns turn out to be sharpening damage rather than manufacturing defects: blued teeth, rocked edges, cutters ground on the wrong face. This guide explains how horse clipper blades are actually designed, so you can sharpen them without undoing the factory work. It covers the large comb-and-cutter sets used on Lister, Heiniger, Liveryman and similar clippers. For small A5-style detachable blades used on horse faces and legs, the method in our general clipper blade sharpening guide applies instead.
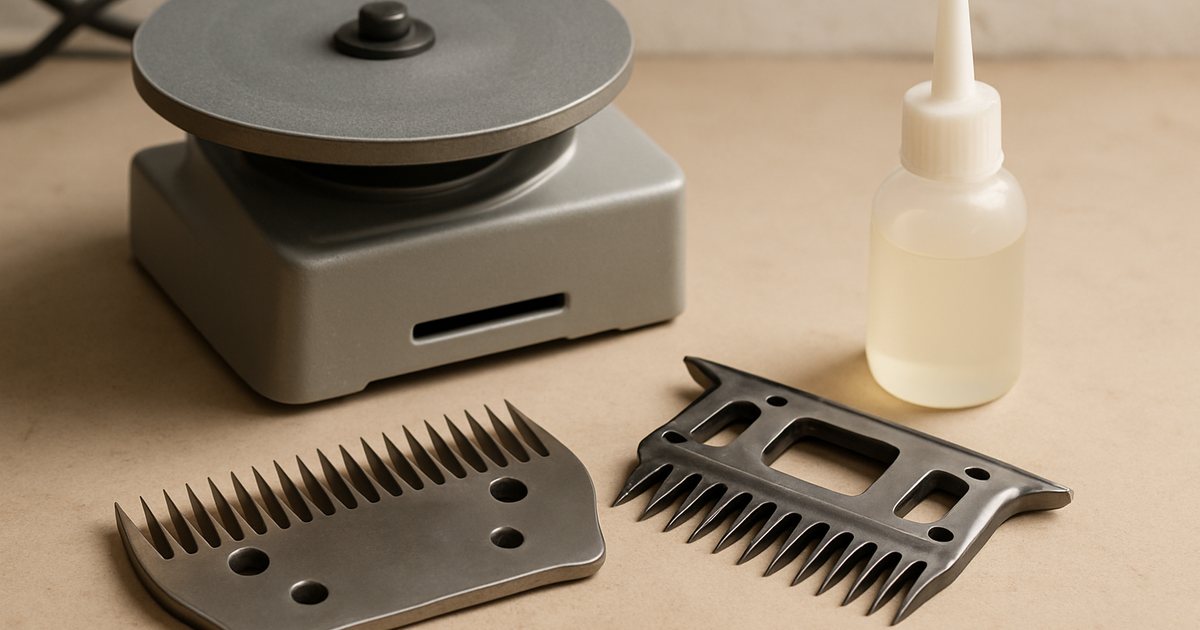
Know Your Blade System Before You Sharpen
"Horse clipper blades" covers three different designs, and they are sharpened differently. Identify yours first.
| System | Typical clippers | How blades are held | Sharpening method |
|---|---|---|---|
| Large comb and cutter set | Lister Star / Liberty, Heiniger Xplorer / Xperience, Liveryman Harmony | Tension knob presses cutter onto comb | Disc grind with hollow grind on the comb; stone for touch-ups |
| Large clipper, fixed-style blade | Oster ClipMaster (A2-type blades) | Tension screw on top blade | Same as comb and cutter; professional service recommended |
| A5 detachable blade | Oster A5, Andis AGC, Wahl KM, Heiniger Saphir with A5 heads | Internal spring, snap-on hinge | Flat lap on a stone or disc; no tension adjustment |
The rest of this guide focuses on the first two systems, which account for most full body clips. If you are not sure which blade your clipper takes, our horse clipper blade guide maps Lister, Heiniger and Oster blade numbers and cross-compatibility.
How a Comb and Cutter Are Designed (and Why It Matters When You Grind)
A comb and cutter set cuts like a pair of scissors with dozens of blades. The cutter slides side to side across the comb, and hair is sheared wherever a cutter tooth crosses a comb tooth. Three design features decide whether that still happens after you sharpen:
- Hardness. Quality blades are hardened to roughly HRC 58-62. The temper that sets this hardness is done at low temperature, around 150-200°C. Heat the teeth past that on a grinder and you re-temper them softer. You cannot see this until the colour changes. Straw-yellow appears around 220°C and blue around 300°C, and by then the edge is permanently softer.
- The hollow grind on the comb. A factory comb is not perfectly flat. Its face is ground very slightly concave, so the cutter bears on the tooth tips and the heel while riding clear in the middle. Contact happens exactly where cutting happens, and friction elsewhere is low. Grind the comb dead flat and you get more heat, more drag and a blade that runs hot.
- Set-back. The cutter points sit behind the comb points — about 0.8-1.5mm on most horse sets. This keeps the cutter away from the skin and lets the comb teeth lift and guide the hair.

When to Sharpen — and When to Replace Instead
As a working rule, sharpen after every 5-8 full body clips, or sooner on thick winter coats and muddy horses. Sharpen immediately if you see any of these:
- The clipper "chews" rather than glides, or leaves tramlines (visible stripes) in the coat
- The horse becomes fidgety partway through a clip — pulling hairs hurt
- The blades run hot after 5-10 minutes even though they are oiled and the tension is correct
Do not sharpen, replace if a tooth is broken or bent, if there is pitting rust on the cutting face, or if the set has already had 3-4 regrinds. Every grind removes steel from the face and shortens the teeth, and once tooth depth drops, the set can no longer hold its set-back or feed hair properly. Grinding a set that has reached that point costs the same as grinding a good one and delivers a fraction of the result.
Method 1: Professional-Style Disc Grinding, Step by Step
This is how sharpening services and our own rework bench do it. The machine is a flat, horizontal rotating disc — typically an aluminium or steel plate with an abrasive paper glued on, or a cast-iron lapping plate with abrasive paste. It is not a bench grinder. A bench grinder wheel cuts on its curved rim and will ruin a clipper blade in seconds.
- Strip and clean. Separate comb and cutter, remove all hair and old oil with blade wash or a degreaser, and dry completely. Grit trapped in oil will scratch the faces you are about to create.
- Inspect under good light. Look for broken teeth, burrs and the shiny contact band on each face. That band shows where the blades have actually been touching.
- Mark the faces. Colour both cutting faces with a permanent marker. After the first light pass you will see exactly where the disc is cutting and where it is not. This is the simplest way to check that you are grinding evenly across all teeth.
- Grind the comb. Hold the comb flat on the disc with its teeth pointing so the disc surface travels from the heel toward the tooth tips, never into the tips. If a moving disc meets the tooth points head-on, a tooth can catch and the comb is thrown. Use light, even pressure and keep the comb moving across the disc. Stop when the marker is gone from the full width of the teeth. Professionals use a holder that produces the hollow grind automatically. By hand, favour the tip and heel areas slightly.
- Grind the cutter. Same approach, cutter face down, keep it moving. The cutter is ground flat. Take off only as much as it takes to remove the marker and the wear band.
- Watch the heat. After every few seconds on the disc, touch the back of the blade. If it is too hot to hold comfortably, stop and let it cool in air. Do not quench it in water, because rapid cooling of a hot, thin tooth invites micro-cracking. Any straw or blue colour on the teeth means that area has lost hardness.
- Deburr and wash. Grinding pushes a fine burr over the tooth edges. Remove it with a very light pass on a fine stone, then wash off all grinding debris.
- Oil and reassemble. Oil both faces, refit the cutter, set the set-back and tension as described below, and run the clipper for a minute before using it on a horse.
Method 2: DIY Stone Sharpening for Touch-Ups
If you do not have a disc, a flat stone can restore a lightly dulled set between professional grinds. It will not recreate a hollow grind and cannot fix a badly worn set, but it is enough for most yards during the clipping season.
- Use a flat diamond plate or waterstone — 1000 grit to cut, then 6000 grit to finish. Check the stone is flat first; a dished stone rounds your edges.
- Lay the cutter face down and move it in a figure-eight pattern with light, even pressure, 10-15 passes. Keep your fingers spread across the blade so it cannot rock.
- Repeat on the 6000-grit side, then do the same for the comb. On the comb, concentrate on the tooth-tip area.
- Wash, dry, deburr and oil as above.
Stone sharpening works because it removes very little steel. That is also its limit. If the set does not cut after two stone sessions, it needs a disc grind or replacement. More stoning will only round the edges.
Reassembly: Set-Back and Tension
Most "freshly sharpened blades that still pull" are actually set up wrong. On comb and cutter clippers, check two things.
Set-back. Position the cutter so its points sit roughly 0.8-1.5mm behind the comb points. Check that it runs parallel, with the gap the same at both ends. Too little set-back risks nicking the skin, and too much means the blade will not cut close.
Tension. Tighten the tension knob until the cutter just makes contact with the comb, then add a small amount more. As a starting point, about half a turn to one turn beyond first contact, then follow your clipper maker's instructions. Test on the horse. If the clipper leaves hair behind, add a little tension. If the blades heat up quickly, back it off. Over-tightening to "make it cut" is the fastest way to overheat a freshly sharpened set, and a hot blade is the main reason horses become clipper-shy. Tension spring wear and replacement are covered in our tension spring guide.
| Symptom after sharpening | Likely cause | Fix |
|---|---|---|
| Pulls hair, leaves tufts | Tension too low, or rounded edges from rocking on a stone | Add tension in small steps; if no improvement, regrind flat on a disc |
| Tramlines in the coat | Uneven grind across the teeth, or cutter not parallel | Marker test to find the low teeth; reset cutter parallel |
| Blades hot within 5 minutes | Tension too high, comb ground flat (hollow lost), not enough oil | Back off tension, oil every 10-15 minutes, send comb for a hollow regrind |
| Loud clatter or rattling | Cutter not seated in the drive fork, or set-back wrong | Reseat the cutter, check set-back of 0.8-1.5mm |
| Dulls again within one clip | Teeth overheated during grinding (lost hardness) | Replace the set; the temper cannot be restored |
Cost: Sharpen Yourself, Send Away, or Replace?
| Option | Typical cost | Result | Best for |
|---|---|---|---|
| DIY stone kit (1000/6000) | $40-90 one-off | Good touch-up, no hollow grind | Private owners, 1-3 horses |
| Postal sharpening service | $10-15 (about £8-12) per set, plus postage | Factory-like edge and hollow grind, tension set | Most yards; the default choice |
| Own disc sharpening machine | Roughly $600-1,800 | Professional result once you have the skill | Large yards, clipping businesses, sharpening shops |
| New branded set | About $40-90 retail | New teeth, full life | Sets after 3-4 regrinds or with damaged teeth |
The arithmetic is simple. A set that costs $60 and survives four $12 regrinds gives five sharp lives for $108, or about $22 per life. Replacing it every time it dulls costs $60 per life. Sharpening wins until the teeth are worn, which is why the 3-4 regrind limit is the useful number to remember. For a fuller comparison, including small blades, see clipper blade sharpening cost: service vs DIY.

Make Every Sharpening Last Longer
- Clip clean, dry horses. Mud and sand are abrasive, and a single session on a dirty coat can dull a fresh set. Bathe or thoroughly groom the day before clipping.
- Oil every 10-15 minutes. Put a few drops across the teeth and the comb-cutter contact face. Our clipper blade oil guide covers which oils work and which gum up.
- Swap sets on long clips. For a full clip on a big horse, have a second sharp set ready and change halfway. The blades stay cooler, and so does the horse.
- Store dry and oiled. Horse blades often sit unused from spring to autumn, and that is when rust pits the cutting face. See how to remove rust from clipper blades if it has already happened.
- Replace cutters more often than combs. The cutter does more of the work and wears faster. Buying cutters separately extends the life of a good comb.
For Distributors and Sharpening Services
If you sell or service large-animal clipper blades, the replacement blade itself is where most margin is lost. Branded sets retail at $40-90, while factory-direct comb and cutter sets from us run about $3.50-7.00 FOB China depending on model and volume. We make them in 440C-class stainless or tool steel, hardened to HRC 58-62 and factory hollow-ground. We supply combs and cutters separately or as matched sets, unbranded or under your own label, from 500 pieces per model. For sheep handpieces, see our sheep shearing blade guide. How we control steel grade, heat treatment and flatness is explained in our stainless steel clipper blade manufacturing guide.
Related Guides
- Horse Clipper Blades: Lister, Heiniger and Oster Guide — blade numbers, compatibility and selection
- How to Sharpen Clipper Blades — three methods for A5 and barber blades
- Clipper Blade Heat Problems — why blades run hot and how to fix it
- Sharpening Cost: Service vs DIY — when to sharpen and when to replace
- Sheep Shearing Blade Guide — combs, cutters and handpiece compatibility